Overview
This is part 2 of a series of posts on Beginning Sitecore Development in Sitecore 8. If you want a little background on how all of the moving parts work together to display a web page to a user, check out the the first post in the series, Beginning Sitecore Development, Part 1 - Dissecting the out of the box Sitecore Home page.
Please note that since this is begginners' series, it is a built in an incremental fashion. As such, while later posts may cover MVC or TDS, this post will be based on using ASP.NET Web Forms and uses Visual Studio publishing.
Goals
In this post, we're going to create a new layout. We will create all of the items needed in the Sitecore content tree, as well as the corresponding files that will be manged by Visual Studio and deployed to the file system.
Setting up the Visual Studio solution
The first step is to set up a base solution in Visual Studio that we will use to hold all of our Sitecore related files that are custom to us.
Open Visual Studio 2013 and select File > New Project. In the dialog box, set the target framework to 4.51, and select the ASP.NET Web Application template. Note that we are using 4.51 because we are building a solution for Sitecore 8. If you are using an earlier version of Sitecore, make sure you pick the appropriate target framework.

On the next screen, select the Empty template, but make sure to check the box to include references for Web Forms.

Once your project is created, you'll want to clean up the extra items we don't need. Remove the App_Data, Models and Global.asax items from the solution. In addition, copy the Web.config from your Sitecore instance over the one that Visual Studio created. The web.config should be located at C:\inetpub\wwwroot\[SitecoreInstance]\Website\web.config.

Now we need to create a folder structure to manage our files. Let's create an assets folder first. We'll use this to store any static files like styles sheets or images that aren't stored in Sitecore.
As a rule of thumb, it's always a good idea to create a folder that matches the name of your site or solution under the root Sitecore folders. This helps organize files if you have multiple sites or projects you'd like to manage. In addition to the assets folder, create a layouts folder as well.
Once you are done, your solution should look like this.

Now let's create a layout. Right click on the layouts\MySitecore\Layouts folder and add a new item. Select the Web Form template, give it an appropriate name, and click Add.

Here you can see what the file looks like after Visual Studio creates it. This would be fine in a standalone web forms application, but for Sitecore, we need to add just a little more to it.

Let's copy some of the entries we found in the Sample Layout that comes with Sitecore. If you recall, that file is located at C:\inetpub\wwwroot\[SitecoreInstance]\Website\layouts\Sample layout.aspx. The content we want to add is highlighted below.
We'll start by adding some page directives. We'll use a Register directive so we can leverage Sitecore controls. In addition, the OutputCache directive will instruct Sitecore how we want to cache our page.
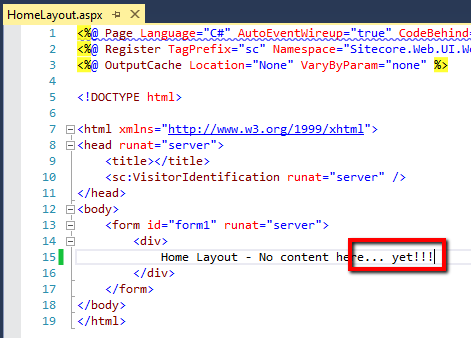
We'll add a Sitecore control for tracking our user and then we can add the content we want to display. In this first pass, we won't add any placeholders. We want to focus on getting all of the plumbing in place between Sitecore and Visual Studio first. We can add functionality afterwards.

Here is the current state of our Visual Studio project. You can see that we have some basic organization, but just one file to deploy - HomeLayout.aspx.

In order to deploy our solution, we need to set up a Publishing Profile. Before you go through this, make sure you have copied the web.config from your Sitecore instance into Visual Studio. If you miss this step, you will wipe out your web.config!
Start by right-clicking your project and selecting Publish. You'll be shown a dialog prompting you to select a publishing target. Click on Custom.

A dialog box will prompt you to name your profile. As a general rule, you'll want your Profile name to match your solution and/or your Sitecore instance name. But use whatever you feel is appropriate. Click OK.

On the Connection screen, change the Publish method to File System and then set the Target location to your Sitecore instance. Make sure you are pointing at the Website folder. Click Next.

On the settings tab, set your Configuration to Debug for now. This will help you during development so you can attach a debugger to your website. Make sure all of the File Publish Options are unchecked and then click Next.

Your Publishing profile is now configured. Click Publish to push out the HomeLayout.aspx file, your web.config, and your project assembly.

Verify that your HomeLayout.aspx file has been deployed to the file system. It will be located at C:\inetpub\wwwroot\[SitecoreInstance]\Website\layouts\MySitecore\HomeLayout.aspx. Go ahead and delete the file for now. Don't worry, it will get updated the next time we publish.
Create the Layout in Sitecore
Now you have a layout that IIS can see, but you need to tell Sitecore about it. Open up the Content Editor and browse to the Layout\Layouts node. Click on the Layout Folder button or right-click on the Layouts node to insert a new Layout Folder.

Just like in Visual Studio, we want to create a folder to group all of our files together within each Sitecore node. Name the new Layout Folder the same as you did in Visual Studio. Click OK.

Now that we have a folder, click on it and then the Layout button or right-click on your folder and insert a new Layout. We want the name for the Layout to be the same in Sitecore and in Visual Studio, so let's name the new layout HomeLayout. Click Next.

Place the layout under our custom Layout Folder by selecting it and then clicking Next.

Now you need to set where the layout will be deployed to the file system. Expand the layouts folder and you should see the folders you created in Visual Studio earlier, assuming you have published.
If you skipped the publishing step, when you expand the layouts folder, your custom folders will not be displayed. You can also create these folders manually on the file system if you skipped publishing, but you'll have to restart the layout wizard.

Now click Create.
If you ran a Visual Studio publish earlier, but did NOT delete the HomeLayout.aspx, you'll get a warning here. Go ahead and delete the file from the file system and click Create again. The wizard will complete and you'll see that Sitecore places a HomeLayout.aspx file there for you.

Here's the state of the content tree after adding our layout:

Now Sitecore knows about our HomeLayout, and so does Visual Studio, but we lost our version of HomeLayout.aspx when we were forced to delete it. Let's remedy that by running a Publish from Visual Studio again to make sure the correct files are known to IIS.
Creating the Page Template
Now that we have a layout, we need to create a page that uses that layout. We'll start by defining the page template.
In Content Editor, select the Templates node. Now right-click on the Templates node and select Template Folder.

We'll keep our convention of defining folders for our project and name the new Template Folder accordingly. Click OK.

Since we will be adding more data templates later, it's a good idea to organize this area of the content tree based on how the data templates are used. This keeps your folder from being filled with lots of unrelated types of templates.
With the MySitecore template folder selected, click the Template Folder button or right-click and insert a Template Folder. Name this one Page Templates.

With the Page Templates folder selected, click the New Template button or right-click and insert a New Template. Select a friendly name that corresponds to your layout, but leave the base template at the default setting. Click Next.

Confirm the location for the template and then click Next.

The wizard should complete. Click Close.

Just to clean things up a bit, we'll also set an icon for our new Home Page template. Select the item in the content tree, then click on the Configure menu at the top. You'll see an Icon button in the ribbon. Click that.

Pick whatever Icon you'd like, then click the Save button in the ribbon.
Creating the Page
Now that we have a Page Template, we need to create a content item that uses that template. Right client the Content node and select Insert, Insert from template.

Select your new Page Template and give an appropriate Item Name, then click Insert.

Next we need to configure how this content item so it'll show on the website correctly. With your new page selected, click the Presentation tab in the top menu and then click Details.

Here you can see that no layout has been specified. Under the Default device, click Edit.

On the Layout tab, click the drop down and select our custom Page Layout. Click OK to close the Device Editor dialog.

Click OK to close the Layout Details dialog. Now click Save in the ribbon bar to save the changes we've made to the content item.
Now all of the pieces are wired up and it's time to see our page come to life. On the Publish tab, click the Preview button.

A new window will open up and show our page.

Not very exciting so far, but now we have all of the pieces in place to start adding more feature-rich components to our site.
Just to prove that our Visual Studio project ties into our Sitecore instance, go back to Visual Studio and make a small edit to the HomeLayout.aspx.
Publish those changes with Visual Studio and then refresh your Sitecore preview. You should see the changes have carried over.

Summary
In this post, we created a Visual Studio project that will serve as the framework for building a custom Sitecore project. We then created the corresponding items in the Sitecore content tree. Finally, we demonstrated that our Visual Studio project could be used to control the presentation of Sitecore items.
No comments:
Post a Comment